Panasonic G7 Review: 4K on a budget

I recently purchased this Panasonic G7 body, along with the 14-42mm 3.5-5.6 OIS kit lens on an impulse. It was available with same-day shipping from Amazon and I was departing for a multi-week trip that included Hawaii and Northwest Oregon, and I wanted to experiment more with video capabilities. Since I was certainly taking my Olympus OM-D EM-5 and its underwater housing, I already planned to bring some micro 4/3 lenses along as well. I also took my hefty Nikon gear, so a smaller body was a welcome addition for casual outings.

Shown here in the optional "silver" finish.

Shown here in the optional "silver" finish.

History

The G7 traces its heritage back to the first ever micro 4/3 mirrorless camera - the Panasonic G1, released in October 2008. While it shares many of the same features from that original camera, albeit more refined, it differs by being the first in this line to offer 4k UHD video recording, a step ahead of the G6 before it. Since the release of the GH1, the Panasonic name has become synonymous with professional quality video capture, and their bodies have become increasingly video-centric. In fact, it's hard to imagine a time when this wasn't the case, and the ancestral G1 didn't even have a video mode at all.

The G7, announced in May 2015, shares a number of similarities with the high end 2014 GH4, such as 100 mbps 4k video (though only in 3840x2160 UHD, not 4096x2160), a number of customizable physical dials and controls, articulating touch screen, Cinelike picture profiles, zebra pattern, and a 2360k dot EVF of good size.

Showing the articulating rear screen.

Showing the articulating rear screen.

Specifications

  • Mechanical shutter speeds from 60s to 1/4000s

  • Electronic shutter speed up to 1/16000s (drops RAW files from 12-bit to 10-bit when engaged)

  • Flash synchronization at 1/160s

  • OLED 2360k dot EVF, 1024x768 XGA resolution

  • Viewfinder 100% accurate, 0.7x full frame equivalent magnification, 30hz or 60hz refresh rate

  • Micro 4/3 lens mount

  • Built in flash + Flash hot shoe

  • 16 megapixel Live MOS sensor, 17.3x13mm imaging area

  • Effectively 2x crop (relative to "full frame" focal lengths)

  • Native ISO 200-6400, boost modes from 100-25600

  • Continuous shooting 7fps, 6fps with continuous autofocus

  • 4K UHD video at 30, 25, 24 fps

  • 1080p video at 60, 50, 30, 25 fps

  • 720p video at 60, 50, 30, 25 fps

  • MPEG-4 or AVCHD codecs

  • Built-in stereo microphone, external microphone through 3.5mm jack

  • SD/SDHC/SDXC card slot

  • Fully articulated rear LCD, 640x480 VGA resolution

  • Takes Panasonic DMW-BLC12 battery

  • Weighs 410g with battery

  • Measures 125x86x77mm

Ergonomics

Upper rear right, showing my favored AF rotary switch and the easily accessed On/Off.

Upper rear right, showing my favored AF rotary switch and the easily accessed On/Off.

The G7 is very well designed from a usability standpoint. It offers a plethora of physical function buttons which can be set to nearly menu item, a customizable quick menu, and a touch screen with its own custom function buttons. As a left-eye shooter, I disabled the touch screen functionality as my nose occasionally grazed the outer right edge of the screen, triggering one of the five custom function buttons located there. Personally, I did not miss those five function buttons, though I added the touch screen on/off item to the quick menu in case I missed it. These custom controls can also be set differently if the camera is in record or playback mode, and with many years behind Nikon bodies I was able to bind Fn5, located at the top left near the viewfinder, to delete. This, along with some other selections, made transitioning between this camera and my D800, used on the same trip, fairly seamless. In record mode, I chose to set the top Fn1 to switch the dials from shutter/aperture to iso/wb, the AF/AE Lock button to AF-On, Fn4 to cycle focus peaking off/low/high, Fn5 to quickly enable/disable electronic shutter, and the top ring Fn button to show the level gauge. As my trip included a wedding where I was in the audience, I enjoyed switching on the electronic shutter to snap a few silent shots during the ceremony. The mechanical shutter is surprisingly loud, not much quieter than my full size DSLR firing. The trade-off to this however is the drop from 12-bit raw files down to 10-bit. Admittedly, I haven't noticed a drastic difference in post processing the 10-bit files, although wide dynamic range compositions such as landscapes may make the differences more obvious.

The top left panel drive mode dial, with internal flash raised.

The top left panel drive mode dial, with internal flash raised.

One major negative I have to mention is the plastic build. I may be overthinking this a lot, but I have a lot of trouble getting over the entirely plastic internal structure. I'm a bit spoiled in this area, as my other cameras have at minimum a metal alloy frame, even if they have plastic panels and controls. The G7 is incredibly lightweight despite its size nearing that of smaller DSLRs, and perhaps that caught me off guard when I first received it. I'm extremely careful with all of my equipment and I've never dropped anything, but I have had the occasional knock or bump when climbing to get a shot or by a passerby in a crowd - and I fear this G7 might begin to loosen up after too many encounters like that. Despite its shortcomings compared to the G7, I found myself trying to take my Olympus E-M5 out a few times during my trip purely because it felt more dense, resilient. I usually plan on keeping bodies for several years, so long term durability is important to me.

One of my favorite control additions, and missing on previous models such as the G6, is the AF-S/AF-C/MF rotary switch. On the G7, this is mounted just under the right thumb, encircling the AF/AE-Lock button (which is just AF-On for me). This makes it incredibly easy for me to quickly engage autofocus in video when I want it, or disable it quickly to save a shot that is too slow to catch up. Video AF is somewhat slow, but it is smooth, accurate, and noiseless unlike my loud jerky Canon 6D/24-105mmL combination.

Another nice feature, though common to Panasonic bodies, is the drive mode rotary dial on the left side of the top panel. This allows immediate access to burst mode, 4k photo modes, and self timers. I rarely used to 4k photo, but being able to switch between single and burst on the fly is very useful. This is nicely different compared to my Olympus and Fuji mirrorless bodies which require a short menu to change drive modes, or my Canons which need two steps (button and dial) to change. This is similar to my Nikon, as the D800 shares a similar dial in the same location.

Focusing

A nicely laid out, uncluttered, top panel.

A nicely laid out, uncluttered, top panel.

The included Panasonic 14-42mm f/3.5-5.6 Mega OIS kit lens is reasonably sharp, and more contrasty than my Olympus 14-42mm f/3.5-5.6 II R, especially at the telephoto end. The image stabilization is somewhat lackluster though, barely noticeable and can't be disabled easily. I used this lens mainly at 14mm with a variable ND filter. I chose a very inexpensive variable ND, and after taking some daytime photos in between video clips, noticed an immediate loss of quality when it was on. About halfway through my trip, I began to just unscrew the variable ND when taking stills. Conveniently, this lens has the same 46mm filter thread as my Olympus 25mm f/1.8, so I was able to use it with both lenses for video. The 25mm f/1.8 is quite good for video, with a nice shallow depth of field and wide focusing ring. The G7 also displays a guide along the bottom when in manual focus mode, showing how close to minimum or infinity the focus is as it is being adjusted. While this doesn't make up for a real distance scale or even an on-screen scale with distance units (such as Fujifilm X bodies), it is useful in combination with the excellent peaking feature and I had little difficulty acquire accurate focus even at wide aperture settings.

Autofocus is acquired exclusively through a contrast detect method, and the G7 lacks on-sensor phase detection elements. This seemingly puts it at a speed disadvantage when compared to competing models from Sony, or even Canon. However, in stills mode the AF is very fast and barely does the back-and-forth hunt common to contrast detect focusing modes. The older Olympus OM-D EM-5 is far worse, and racks back and forth three or four times every time it tries to acquire focus. In video mode the focus is decidedly slow, clearly focusing on smooth transitions and accuracy rather than the snappier speed of the Sony's or Canon's. I'd prefer to have the faster focus as an option, but most video is manually focused anyway so I haven't missed the speed as much as I initially thought.

Image Quality

While this camera shares the same 16 megapixel count of other micro 4/3 bodies going back for years now, some revisions have squeezed out somewhat better noise performance than past bodies. I was surprised, when perusing some studio comparison images, that at higher ISOs this 16mp sensor has slightly better noise performance than the newer 20mp micro 4/3 bodies such as the Pen-F, GX8, or even the OM-D EM-1 II. Of course, when compared to APS-C or FF bodies such as the 6D, 16mp Fuji X's, etc it does perform somewhat worse in stills. I did notice something else I wasn't expecting though, and that is the 4k video output seems to be oversampled a bit from the sensor, meaning the video out of this camera is actually superior in terms of noise and grain when compared to many cameras with larger sensors. I've seen that the new Sony A6500 also oversamples its 4k footage, so that camera is probably better than this, but it is also nearly three times the price.

Raw files are a nice 12-bit sample, with good color accuracy and a decent dynamic range despite somewhat poorer high ISO performance compared to larger sensors. It's important to note that when in electronic shutter modes, RAW files drop down to 10-bits of color information. The G7 also offers 4k photo modes, essentially using a short burst of 4k video from which the user can extract 8 megapixel 8-bit JPEGs from. This works well, though with the high continuous burst rate I found it more advantageous to capture action with the mechanical shutter rather than hoping for a single distortion free frame of video to extract. Rolling shutter is present, and fast moving objects do have some distortion to them as the sensor readout goes top to bottom. This limits the usefulness of this feature in my opinion, but it would excel at capturing a good moment of someone's facial expressions or to get a good picture of someone who frequently blinks for example.

Take a look at these samples from DPReview, showing an obvious difference in grain between the G7, OM-D EM-1 Mark II, Fujifilm X-E2, and the Canon 6D. Especially take note of the text clarity on the color wheel. DPReview Comparison

Final Comments

This has been an excellent body for me, and I enjoyed shooting the 4k video. When mounted on a tripod, I captured some very clear clips, although a few are slightly out of focus (user error). Down sampling these 4k clips to 1080p disguises my mistakes in the footage, but for the clearest shots I can easily define a 1080p sized window and pan across the shot at a fixed speed in premiere - easy to do and has some very nice looking results with minimal effort. Perhaps I need more practice, but most of the clips I took while moving around were a little too shaky to use, even after using software stabilization and dropping down to 1080p. I know a gimbal unit would be optimal for this kind of on the go video shooting, but I've actually opted to sell this G7 and purchase the newer G85 kit. I'm used to the in-body sensor stabilization from my Olympus E-M5, and I've had many stable videos on that camera (but the video quality is very low on that camera). I expect the G85's stabilization, combined with the lens stabilization, to give me smoother handheld footage, and offer some other features I'm missing from the G7. I also expect the G85 to provide better stills, lacking a sensor AA filter should squeeze out some more clarity from the 16 megapixel sensor without the noise penalty of upgrading to the 20 megapixel bodies. This was my first Panasonic bodie and essentially eliminated my Olympus E-M5 from non-underwater use, as the improvements in the viewfinder resolution and autofocus speed are drastic. If only I could find an affordable underwater housing for the G7 or G85.

  • Image Quality: 6/10

  • Video Quality: 8/10

  • Stills Features: 6/10

  • Video Features: 8/10

  • Usability: 8/10

  • Durability: 3/10

  • Price/Performance: 8/10

  • Overall Score: 7/10

Click here to see what these ratings mean


Just got a pair of vintage Nikons

Recently, I placed offers on two Nikon bodies I've been lusting after for years. Somewhat unintentionally, both were accepted and I'm now the owner of both a late model Nikon FM and an early Nikon FM2. Oops!

I've always held small mechanical SLR's in high regard, and I've been told many times that the Nikon FM series fit this category. My first vintage SLR was an Olympus OM-1, which enthralled me, and thus every film body I acquire put up against it for comparison. These are definitely similar in many aspects. Read my article on the OM-1 here if you haven't already.

The original FM

An earlier non-"N" FM2

They each arrived in fairly mediocre condition, though I expected this based on the descriptions. The FM had a non-working light meter and a fair dent in the top plate next to the film rewind knob. I was able to remove the bottom plate and touch up some solder on a wire connection, and this restored functionality to the meter. The FM2 was coated in dirt and the flip up rewind knob does not stay down. I completely overhauled this camera and it is now extremely clean, although I was not able to source a part for the rewind lever.

FM's dent and metal film door locking mechanism.

The FM2's plastic lock. This silver rewind lever occasionally flips up on its own.

One feature that put me off at first is the requirement for the film advance lever to be in the pulled out position to fire - with my OM's, I've always wound the shutter, then rotated the advance lever completely flush with the body and placed my thumb outside of it before firing. These cameras lock their shutter buttons in this position, so you have to leave it partially clicked out in order to fire. Leaving the lever out also enables the meters on both bodies, while retracting it turns it off. This is a smooth implementation compared to the OM-1's physical switch on the top plate, and far better than the OM-4T's "move to mechanical speed or wait/pray for the meter timer" method. We've all had issues with batteries dying in the field, or accidental bumps firing the shutter and you end up with a wasted frame - the Nikon's solve both of these problems with their advance lever on/off method.

FM's aperture coupling tab, disengaged.

FM2's plastic aperture indexing ring.

After spending some time with both bodies, I think I like the regular FM more than the FM2. Although it lacks the fancy, honeycombed, titanium, 1/4000 shutter mechanism of the FM2, it seems better constructed to me overall. Several parts that are machined metal on the FM transition to plastic on the FM2. This includes the film door lock lever, the aperture index coupling on the mount, and the film advance stopper. Additionally, the FM has a tiny button that allows you to flip the aperture index coupling tab out of the way, enabling the use of non-AI lenses with this camera (albeit limiting you to stop-down metering). Personally, I rarely shoot with a meter at all and there is a plethora of inexpensive and interesting non-ai glass available for very low prices, as most modern Nikon bodies can't mount them. It is definitely a trade off - you would give up the ability to take daytime portraits at f/2.8 (or wider) on the FM2 for the ability to use non-ai lenses. However, I can always mount a neutral density filter on the non-AI lens if that is my goal.

The FM's main controls. Flash X-sync, marked in red, is limited to 1/125. The film advance stopper is hidden behind the shutter speed dial.

FM2's control area. Note the small tab just off of the advance lever, which stops the film from advancing. This also has a more modern style shutter button and faster flash X-sync speed of 1/200.

Stay tuned for a more in depth review of each body, once I've had the chance to shoot a roll or two with them.

The Manta Dive - Video

Back in April 2016, I took a trip out to Hawaii's "big island." While there, I went on a dusk and night time dive, where I used an underwater housing with my Olympus OM-D E-M5 to capture stills and video clips. Well, a year later, I've finally put together a reel of that iconic dive.

Olympus OM-1: My Favorite 35mm SLR

Back in 2012, I bought my first OM-1, a chrome MD model from ebay. Although I had prior experience with some leftover film SLR's handed down from my parents, this camera rapidly became my favorite and really activated my passion for film photography. At the time, I was using the Nikon D800 for digital work, and the OM was the first camera to slow me down, helping me focus on the art of composition. It's hard not to get excited writing about this camera... it is the pinnacle of SLR design to me. Since then, my OM collection has grown to include a black OM-1, an OM-4T, and several lenses.

The OM-1 MD in Black

History

In 1972, Olympus released the M-1 body, beautifully designed by a Yoshihisa Maitana. Shortly after, Leica expressed concern about the name being too similar to their M-series rangefinders, so it was renamed the OM-1. By 1974, this was replaced with the OM-1 MD, which added a coupling on the bottom plate to allow the use of electronic motor drives and winders. Some standard OM-1's were also modified to add this linkage as well. The OM-1n, with several updates including automatic flash synchronization and a smoother film advance lever, was released in 1978, but by 1988 most of the single-digit professional level OM's were discontinued, except for the OM-3T and OM-4T lines.

The OM-1 was designed as a professional level, fully mechanical camera, but with an emphasis on a small form factor. Unlike the beastly Nikon F, F2, or Canon's F1, which had set the standard for pro-level SLR's at the time, the OM was far smaller, lighter, and nicely refined. It also came announced with a wide system of lenses, many of which followed the same size philosophy as the bodies. It also offered flash integration, with a removable shoe that screws in to a socket on top of the prism housing, much like a modern SLR.

The small size and quality of optics really endeared this camera to a number of photographers, and is at least somewhat the inspiration for later small-bodied mechanical cameras such as the Pentax MX (1976) and Nikon FM (1977). The later OM-2 is also highly praised, offering aperture priority automatic exposure and several other interesting features, but relying on batteries to control it's electronically timed shutter mechanism.

Eventually the OM-1n evolved into the OM-3 and then OM-3T, although they were sold alongside each other for some time. The OM-3/T bodies are the same size as the OM-1, offer a marginally smaller viewfinder, have a fixed hot shoe, a similar mechanical shutter with a higher top speed of 1/2000, but most notably an advance spot metering system accessed on the top plate next to the shutter button. These cameras have prices that outweigh their practicality, but it's impossible to ignore the level of innovation and accuracy of the spot metering systems they include.

Mir.com has an extensive history, listing of lenses, and other information on the OM series in great detail. See here: Mir.com

And in chrome, the more common finish

Specifications

  • Horizontal travel cloth shutter

  • Shutter speeds from 1s to 1/1000s

  • Flash synchronization at 1/60s and below, shown by blue shutter speed numbers

  • Pentaprism viewfinder with 97% accuracy and 0.92x magnification (it's huge!)

  • Interchangeable focusing screens

  • OM bayonet mount

  • Hot shoe socket

  • Single stroke film advance

  • Through the lens, full aperture metering, with needle shown on left side of viewfinder

  • Shutter speed selectable via a ring around the lens mount

  • ASA/ISO speed for meter selected via a locking dial on the top plate

  • Self-timer on front, approximately 12 second maximum delay

  • Removable film door

  • 1.35v PX625 or equivalent battery powered meter (can be modified to use modern 1.5v)

  • Weighs 510g

  • Takes 135 36x24mm film

Ergonomics

The blue shutter speeds, which allow flash synchronization, are clearly visible on the black body.

Probably the most remarkable attribute of this camera is its deviation from many of the conventions to operate a camera at the time. Not only was it far smaller than any full frame SLR at the time, it also contained almost all of the features of larger cameras. It also offered an enormous and bright viewfinder, complete with thirteen different, interchangeable, focusing screens to tune the camera for a specific purpose or preference.

The other feature most noticeable at first glance is the shutter speed ring surrounding the lens mount, as opposed to being on the top plate as many other SLR's. Instead, the area usually designated for shutter speed is replaced by an ISO dial, allowing the shooter to choose from 25-1600. This has no effect on exposures, only the calibration of the metering needle. The metering system can be turned on and off by a rotating switch on the top plate, between the prism housing and the rewind knob. This simple switch makes it easy to use the meter only when necessary, saving batteries and time.

The ASA dial rests on the top plate, an interesting departure from traditional camera design.

The lens mount release and depth of field preview buttons are both mounted on the lens itself, so the body also has a minimalistic front panel. The self-timer lever is mounted to the front panel, and this is controlled by turning the lever to point away from the lens or down, then pressing a tiny lever over which is exposed after turning the timer lever. This begins the countdown to fire, and unlike other SLR's with a similar mechanism, pressing the shutter button will immediately fire the shutter, so care must be taken to remember to trip the small lever on the self timer instead of using the top plate shutter button.

The film door is opened by pulling up the rewind knob, then another upward motion against a spring loaded mechanism releases the door. Rewinding requires the user to turn the small dial just under the shutter button on the front plate so that it is facing the "R," then flipping out the rewind knob and turning it in a clockwise direction until the film is completely inside of the canister.

The bottom plate is home to the battery compartment and motor drive connections, if available. Early M-1's and OM-1's did not have the coupling cap or electrical contacts to allow usage of motor drives or winders. However, many OM-1's were modified to add this functionality. These are sometimes identified by the small "MD" name plate being added on the front of the body, but unlike models produced as "OM-1 MD," it is located on the opposite side near the top, outside of the film rewind switch. I have used the Winder 1 before, which is limited to single shots and takes AA batteries, but I doubt I would ever use a motor drive with these bodies - it increases the noise and size drastically, taking away its best advantages. However, I can see why this would have been important at the time, marketing this to compete against other professional level cameras.

Focusing

Focusing action is very smooth on the Zuiko lenses, although many of them are very small in size and thus have thin focus rings. Some of the body of the lens is also shared by the aperture ring, and a ring at the base of the bayonet which includes the lens release button and depth of field preview button. Lenses such as the 50mm f/1.4, 50mm f/1.8, 35mm f/2.8, 28mm f/2.8, 28mm f/3.5, 21mm f/3.5, and 18mm f/3.5 all have thin, though nicely dampened, focusing rings. Longer lenses, such as the 85mm f/2.0, 100mm f/2.8, 135mm f/2.8 or 135mm f/3.5 all offer wider rings.

Film door open, revealing the cloth shutter mechanism.

The camera itself offers interchangeable screens, allowing for a nearly endless set of possibilities. The standard screen is a horizontal split-image type, with a rough microprism collar, all over a ground microprism matte. This allows depth of field to be previewed on the entire frame,  easy focusing on vertical lines such as buildings and faces using the split-image, and the microprism collar for fine tuning on other subjects. Lenses with a maximum aperture of f/5.6 or smaller do darken one half of the split-image, but the other screens available, such as the 1-4 or 1-7 screens offer a brighter image field designed for use with smaller apertures on super telephoto or macro lenses (though these are microprism only, no split image).

Most importantly, the viewfinder image is extremely large and bright. While it doesn't show the shutter speed or aperture setting, this means the field is uncluttered and free from distractions or obstructions. I find this arrangement to be the pinnacle of viewfinder design, and although extra attention must be paid to avoid mistakes in exposure, it does not hinder composition in any way.

Image Quality

Due to the ease of composition and mechanical operation, I find this camera optimal for my shooting style. I have gotten a number of nice exposures with this camera, and these two OM-1's are my most used film cameras by a wide margin. It may seem strange to some, but I frequently carry one of these with me, and my focus is so much on composition that sometimes I come back having only taken a frame. There's something about these bodies that provoke an intimacy with the art of photography for me, and I enjoy this type of imaging, which has also had the outstanding benefit of improving my artistic eye with my digital cameras as well.

Technical quality is excellent on most lenses, and some such as the 35-80mm f/2.8, 100mm f/2.0, and 18mm f/3.5 all have high values on the market. In my experience, the 50mm f/1.8 is one of the best lenses available for any system, and it is somewhat sharper than the f/1.4 version at all apertures. I have not had the chance to use the 50mm f/1.2 or 55mm f/1.2's, but I hear these are excellent stopped down and have dreamy character wide open. I have also found the 28mm f/2.8 and 21mm f/3.5 to be excellent, the 28mm being one of the sharpest lenses I have adapted to use on my mirrorless cameras like the Fuji X-E2. I also have an 85mm f/2.0, which I acquired very inexpensively due to fungus on the front element and an engraving around the lens mount. After removing the front element and cleaning off the fungus, I had some issues with the aperture ring occasionally locking up. This lens for me is quite sharp stopped down to f/4.0 or so, but has a slight dreamy haze at f/2.0, at least on the digital bodies I used to test. A more pristine sample is likely much sharper wide open here. I've also been lusting after the 135mm f/2.8, which from what I've seen has excellent optics and a nice built-in slide out hood.

Samples below taken on either Fuji Provia 100 & 400, or Kodak Ektar 100, or Portra 400, or maybe also Lomography brand 400 or 800 C-41.

Final Comments

This isn't exactly an unbiased review, but I really can't restrain my enthusiasm for this camera system. Some of my best memories were recorded with these, and I felt a lot of nostalgia perusing my library to decide which photos to include in the samples section. As a buyer, they are relatively inexpensive, and if the lack of automatic exposure modes is an issue the OM-2 isn't much more. It is very resilient, and mine have been to parties, out in the rain, and fired many times without so much as a single jam. I also measure my shutter mechanisms, and both of these are still dead on accurate at the lower speeds, and issue many older mechanical cameras have issues with. Black bodies exhibit beautiful brassing when worn in, and the chrome finish also ages nicely. There were enough black ones made that they don't cost much more than chrome. I suppose the only negative I can say is that they are dangerously addictive, and while I'd absolutely love to have some of the rarer specimens such as the OM-3T, 35-80mm f/2.8, or 100mm f/2.0, the prices are astronomical. However, I completely understand because for many, this system is unequaled in 35mm photography.

Looking to pick one up yourself? Check here:

Current OM-1 Listings on eBay

New Guitar: 1992 ESP Maverick Deluxe - Blue

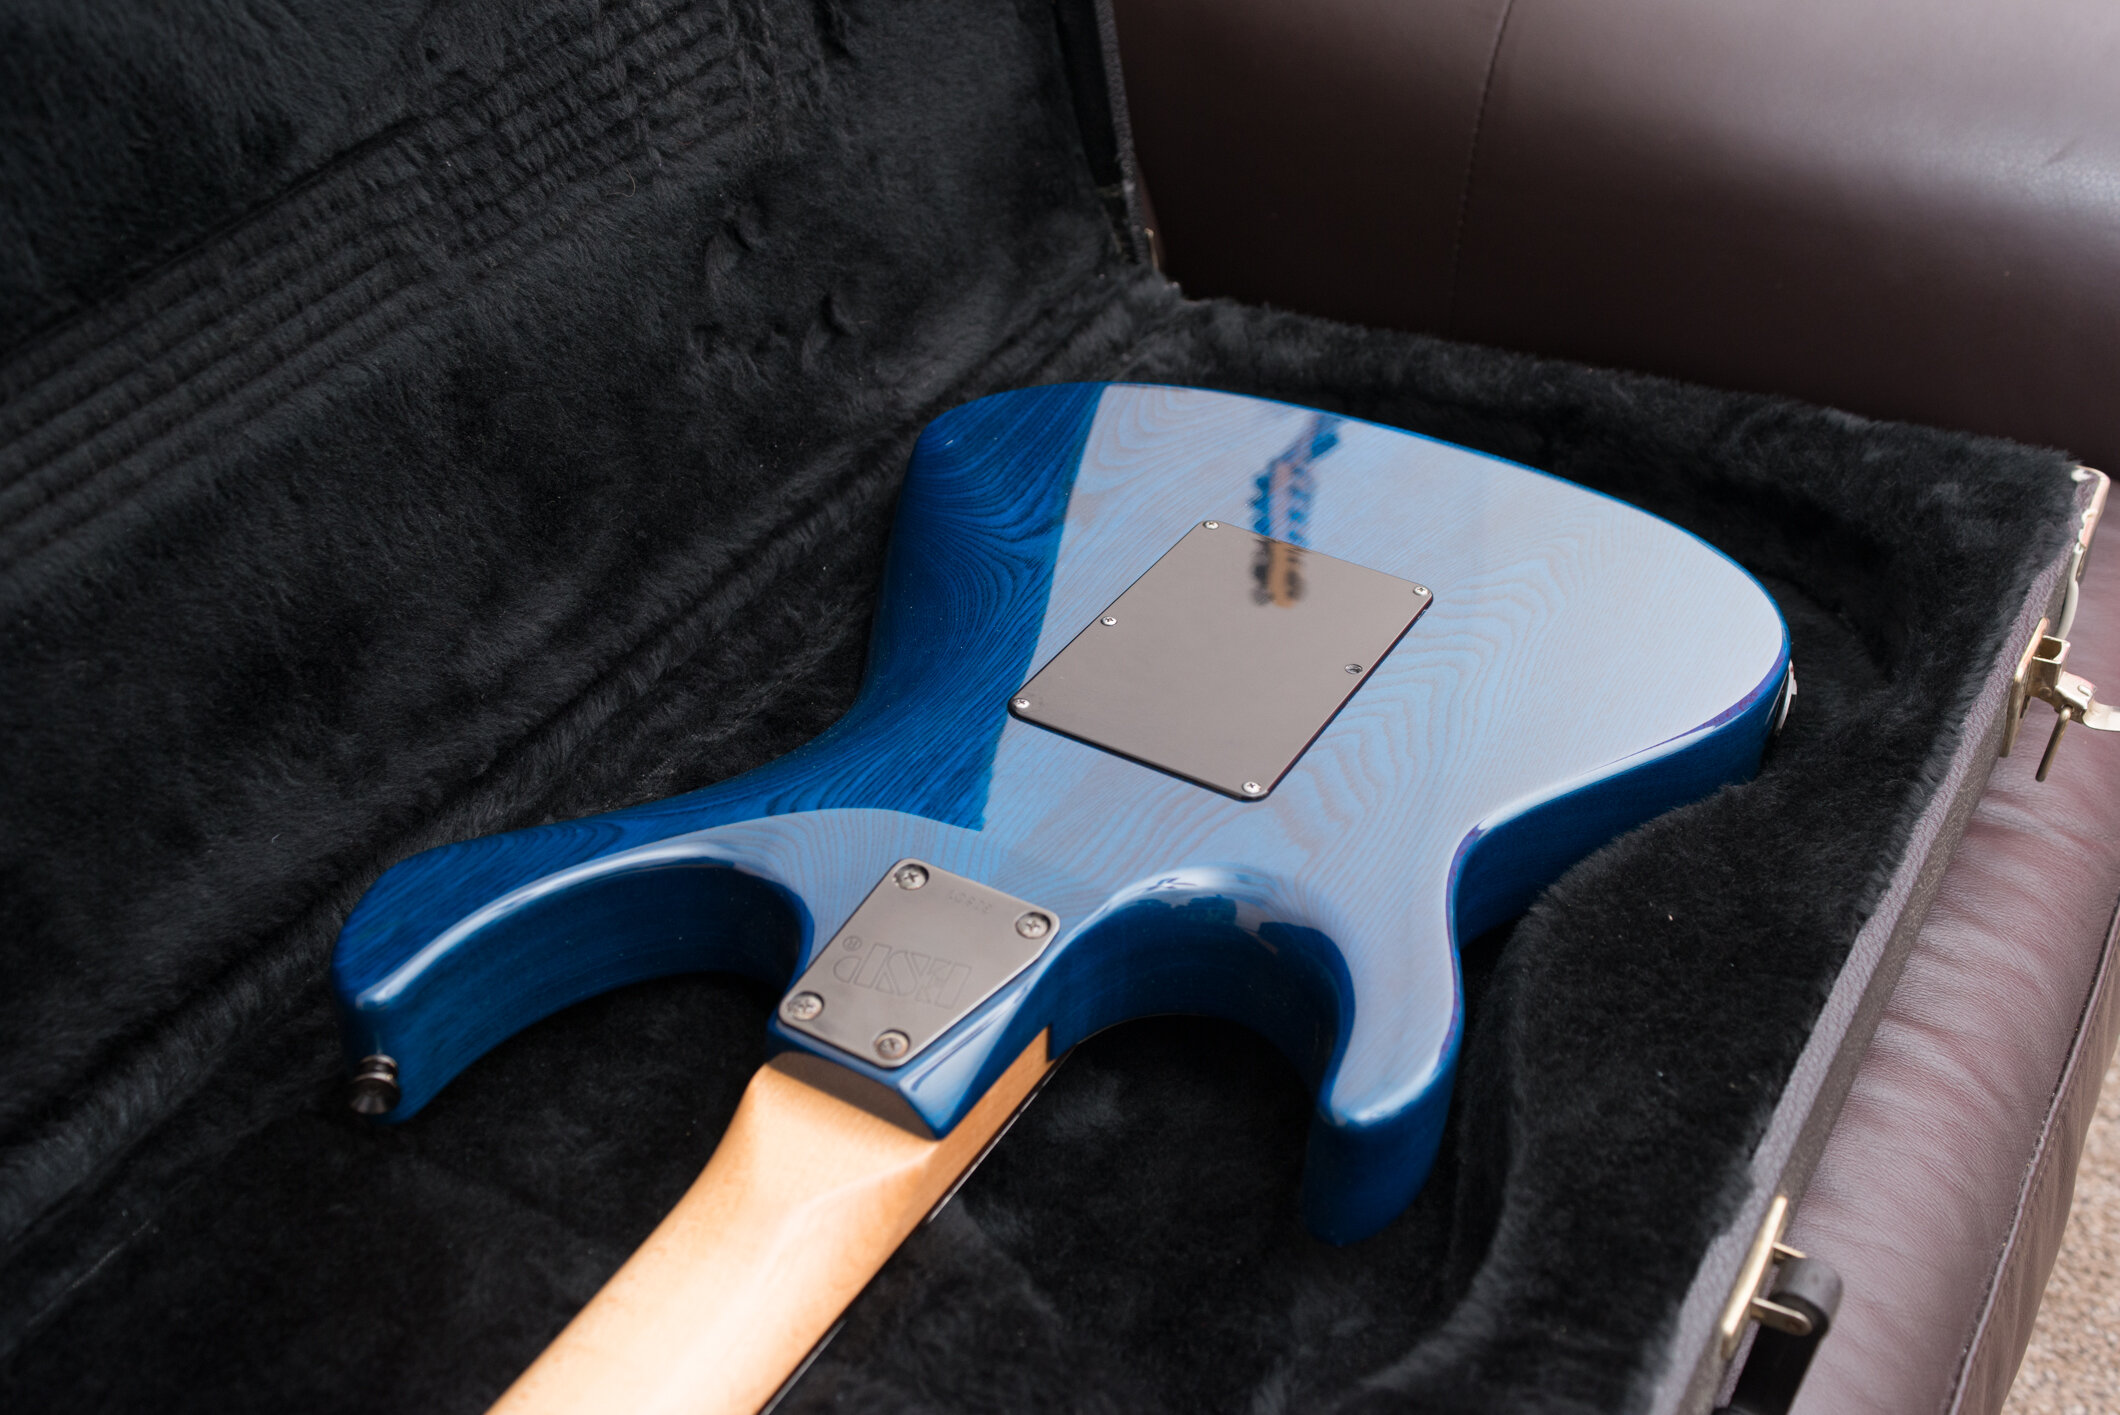
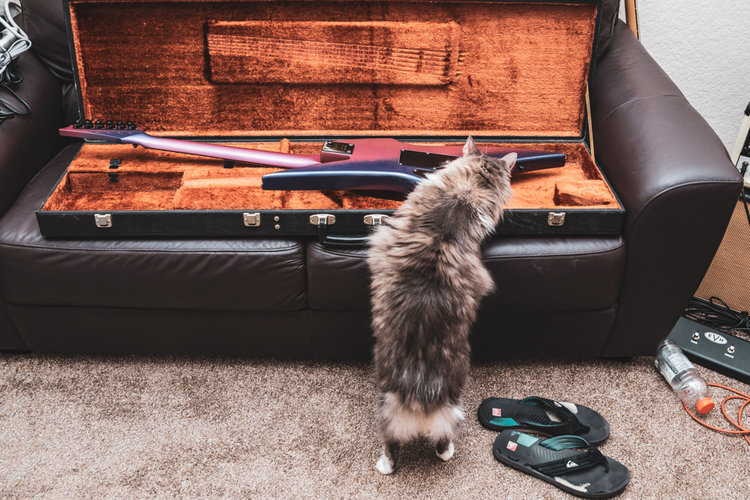
Somehow found another one of these - this time in transparent blue. It’s just like my red one, but this one has the factory pickups instead of EMG’s and a rosewood fretboard instead of maple. This was listed on Guitar Center’s used listings, and arrived with the original case all in excellent condition.

I’ve since converted this one to EMG’s, equipped with an 85-SA-SA combination to add a little variation from my red one, and tuned down to D standard with the floyd still floating.

New Amp: Splawn Quickrod (2008)

Since the Laney AOR didn’t quite scratch the JCM800 itch, I went on the hunt again. A local vintage music shop had been posting listings on craigslist, but the owner does not ship. I saw a JCM800 2204 in some photos, so I took a day and drove down to see what was in the shop.

This shop is Jimmy’s Vintage Music of Auburndale FL, a beautiful small town roughly halfway in between Orlando and Tampa. It was no let down - vintage Fenders, Marshalls, and all manner of beautiful guitars were on display.

After trying out the JCM800 2204 and feeling that the master volume was just too difficult to control, the knobs very easy to rotate and slightly scratchy at the lowest settings due to age made it hard to imagine taking it home to my studio. The owner suggested I try the white Splawn, complete with a road case and matching white 4x12 Splawn cab.

I was immediately thrilled by the sound - it wasn’t overly gainy, but it was much thicker, fuller, and more in line with the modded Marshall tones I wanted out of this type of amp while keeping its vintage Character. After some quick negotiating, I took the head home sans cab and road case. The cab was fantastic - no argument - but I just couldn’t justify the space at home.

NFX_7459.jpg


New Amp: Laney AOR 50 Series II

While I love my current amps, I’ve been on the lookout for something a little more classic sounding. I’ve read that Warren Dimartini of Ratt, one of my favorite guitarists, used Laneys on stage in the 80s and heard these AOR models compared to the JCM800s of the time.

However, these are priced far lower than any JCM800 I’ve seen, this one I picked up for only $350 on Reverb! (This is my first Reverb purchase as well).

0ME50008.jpg

My first impressions are that it is no JCM800 clone, or at the very least the circuit is different enough that it isn’t a replacement for one. The AOR channel has quite a bit more gain on tap, and the regular channel is much darker than any 2203/2204 I’ve played. There are several “pull” knobs that add in boosts in the EQ, so it’s definitely more versatile than a stock JCM800 type amp.

So far, my favorite setup is using the “AOR” channel with the bright engaged, but the normal channel without. I can dial in a decent dirty clean without being ear piercing, then footswitch to the AOR channel for a huge gain boost as well as cutting through better with the additional highs the bright switch adds.

More Details Here

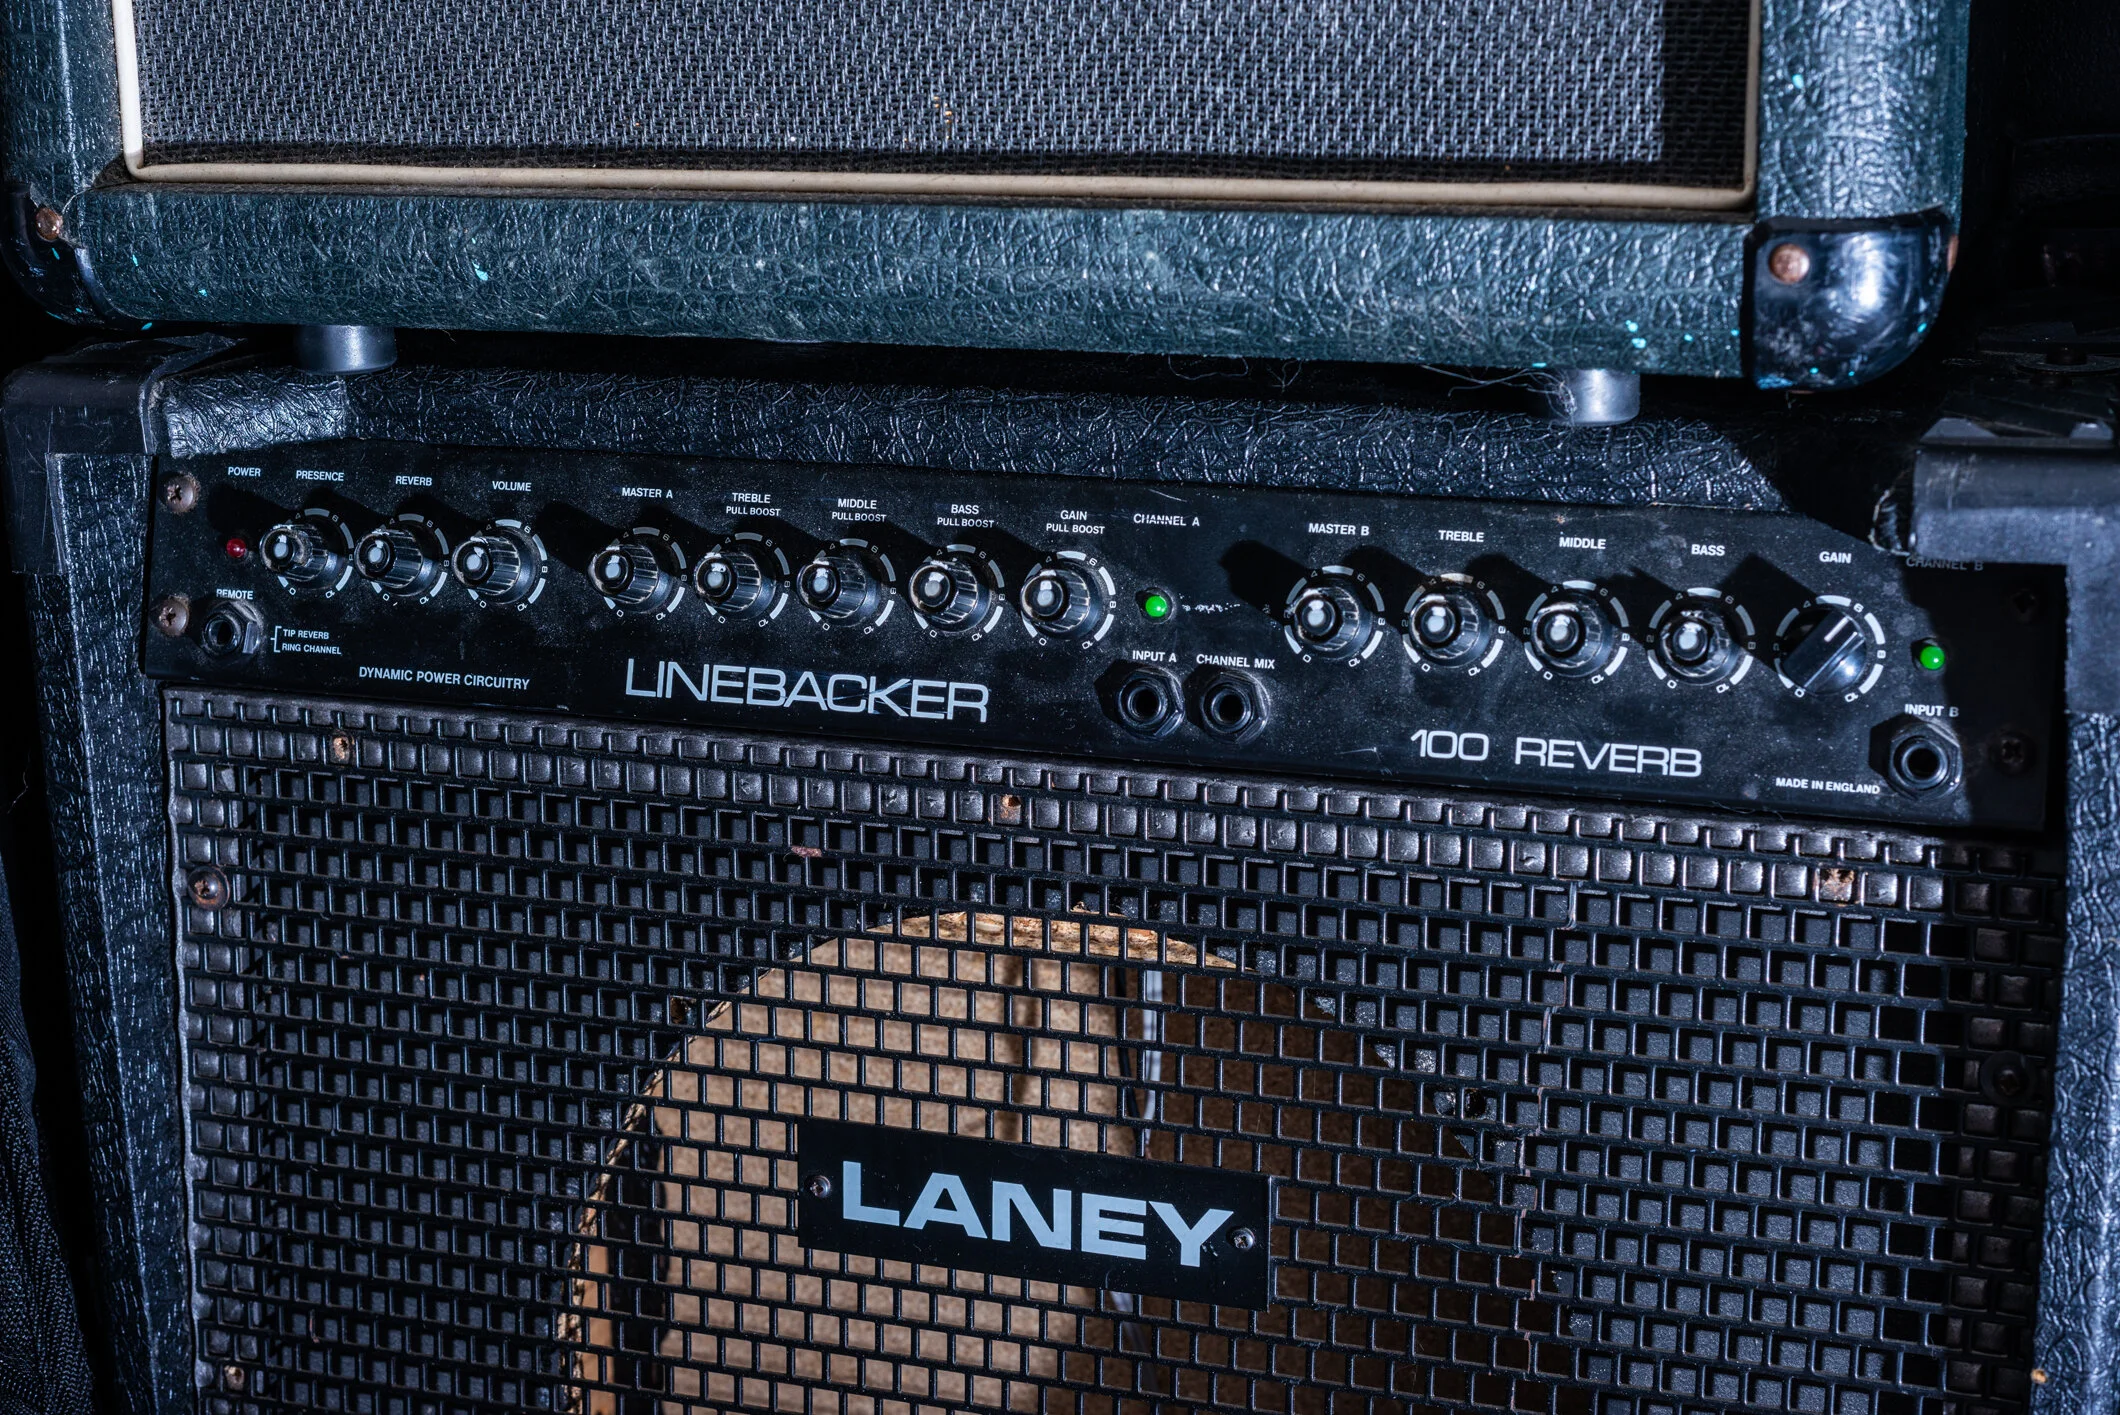
New Amp: Laney Linebacker 100R

Happened across this one in my local GC super cheap. After some quick googling, I found these came with a few variations of nice vintage Celestion speakers… the salesperson wouldn’t let me open it in the store (closed back) so I bought it, took it out to my car and opened it up in my trunk instead.

I was pleased to find an ‘88 Celestion G12H-100 speaker - I knew it would be nice but I didn’t expect it to be as good as it is - one of my favorite speakers so far!

NFX_0882.jpg

New Amp: Jet City JCA2212C

Back when I was searching for my first tube amp, I settled on a Marshall TSL. However, near the top of my list was the Soldano Avenger, or Hot Rod 50, which could be found in the low $1000 range at the time. I never got my hands on a real Soldano, but with the Jet City amps out using very similar circuit designs it’s hard to argue with them for the price.

While browsing the MusiciansFriend website, I found an open box JCA2212 combo amp in “fair” condition for a very low price - $193. It arrived with some large dents on the top panel, but otherwise it’s in good condition and the amp sounds perfectly fine.

The stock Eminence speaker is close to the Legend series, though I’m not wowed by it. I plan to purchase a Celestion Creamback speaker instead and see how that sounds instead.

FXDX1270.jpg

These Jet City amps are also popular modding platforms, since they have relatively simple circuit designs and the Soldano circuits are easily reversed so in theory, you could modify a Jet City amp to be nearly identical to a real Soldano amp.

I planned out and purchased a number of different caps and resistor values to try in different areas of the circuit. Initially, I installed 5x 3-way mini switches, but settled instead of some larger 2-way switches with component values that made a more noticeable change. This was my first experience with modifying amps and I had a blast and learned a lot. Looking forward to tinkering with some other amps in the future!

FXDX1272.jpg

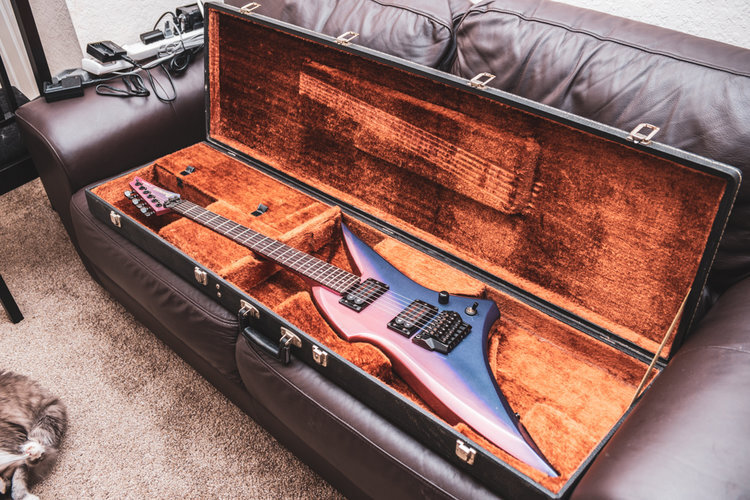
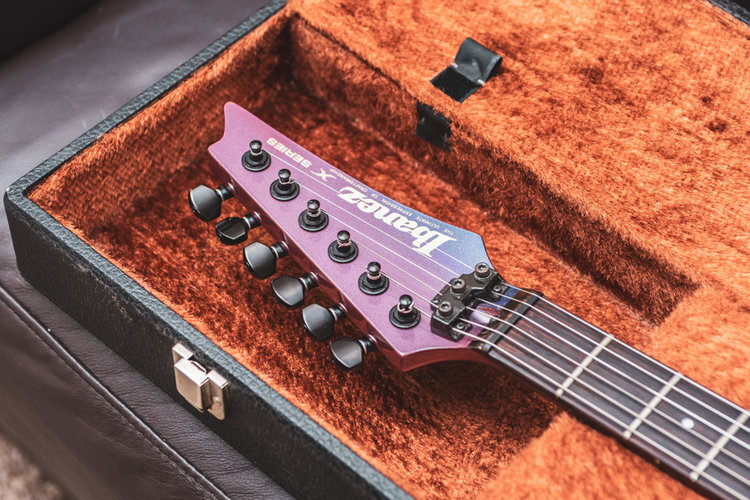
New Guitar: 1985 Ibanez XV500

I’ve known about this model for a while, and it was my go-to when someone would ask something like “what’s the most ridiculous guitar you’ve seen?” While working for Colorvision, I happened to see an ad on my local craigslist at a very reasonable price. Generally, I only use craigslist when searching for something specific across all of craigslist, not just local postings, so this was a lucky find. After some quick scrambling, I spoke with the owner who was very amicable and we decided on a public meeting place and agreed on cash as the payment method. After having dinner, I came to a horrible realization: I had no ATM card. I called my brother, who I had intended to bring along anyway so I wasn’t alone, and he was nice enough to withdraw some cash for me and I returned the amount to him via paypal. My brother and I met the owner in the parking lot of a gas station along I-4. He had brought a tiny battery powered amp and a pick and let me play the guitar sitting in the back of his SUV for a moment - above and beyond what I would expect from any craigslist meetup. We both had a nice chat about cool guitars from the 80s, I paid him and took it home.